· Zayd Khan · technical · 4 min read
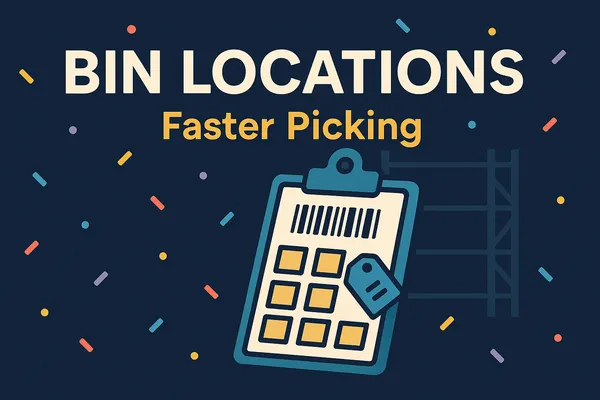
How to add bin locations to Shopify packing slips (Order Printer guide)
Show warehouse bin locations on every packing slip. Copy-paste Liquid code for Order Printer that displays product storage locations for faster order picking.
Why add bin locations to packing slips?
This customization is perfect for businesses that:
- Store inventory across different warehouse sections
- Keep products in separate rooms or storage containers
- Use shelves, bins, or zones for organization
The business benefits are clear:
- Faster order packing with precise location guidance
- Quicker training for new warehouse staff
- Reduced fulfillment errors
- No need for separate location reference documents
This pairs well with quantity increments, which standardize order sizes and make warehouse picking more predictable.
Step 1: Setting up your metafields
Start by creating metafields to store your bin location data:
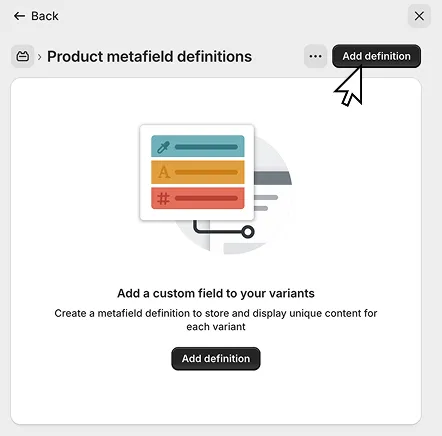
Go to Settings > Custom data > Metafields in your Shopify admin
Decide where to store your location data.
- Choose “Product” under “Metafield definitions” if all variants share the same location
- Choose “Product variant” under “Metafield definitions” for variant-specific locations
- You can set up both if your inventory system requires it
Click Add definition, see image below
- Configure the metafield with these settings:
- Name: “Stock Location”
- Namespace:
inventory - Key:
stock_location - Description: “Physical bin/shelf location where this item is stored”
- Type: “Single line text”
- You can leave the rest of the fields blank
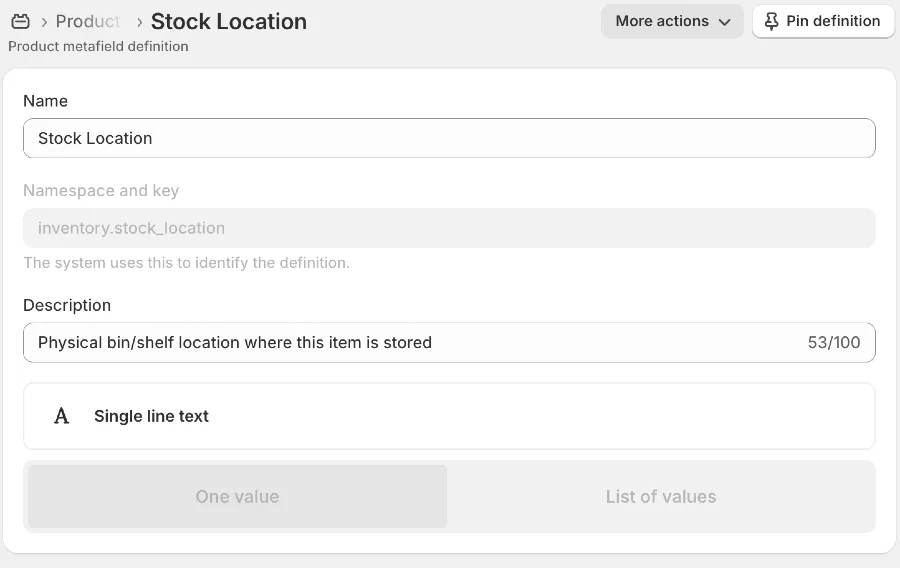
- Click Save
Step 2: Install Shopify Order Printer.
Go to the Shopify App Store and search for “Shopify Order Printer” or click link below to install
Shopify Order Printer - Print custom packing slips, invoices, shipping labels | Shopify App Store
Step 3: Adding location data to your products
Now fill in the location information for your products:
- Open a product in your Shopify admin
- Scroll down to find the “Metafields” section
- Locate your “Stock Location” field
- Enter the location identifier (for example, “L1” for office inventory)
- Save the product
Consider using a consistent naming system that works for your warehouse layout:
- “A12-B3” for Aisle 12, Bin 3
- “WH2-Z4-S8” for Warehouse 2, Zone 4, Shelf 8
- “R1-S3-B5” for Room 1, Shelf 3, Bin 5
Step 4: Customizing your packing slip template
Next, modify your packing slip template to display the location data:
- In Shopify Order Printer page, navigate to Templates > Packing slip
- Use the following template and add it to your Shopify Order Printer packing slip
Shopify order printer app packing slips with bin locations (using metafields)
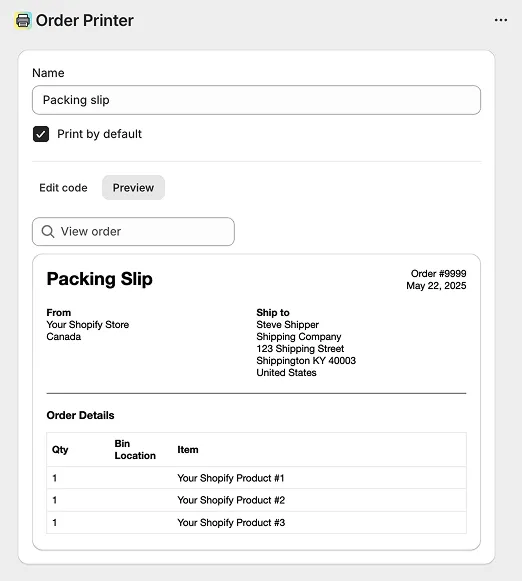
- If you have a custom packing slip, add the following code:
{% assign variant_bin = line_item.variant.metafields.inventory.stock_location_variant %}
{% assign product_bin = line_item.product.metafields.inventory.stock_location %}
{% assign bin_location = variant_bin | default: product_bin %}
{% if bin_location != blank %}
  Bin location: {{ bin_location }}
{% endif %}- Save your changes
This code first checks for location data at the variant level, then checks the product level if needed.
Step 5: Testing your implementation
Verify everything works correctly:
- Create a test order with a product that has bin location data
- After saving your template, go to the order details page
- Click “More actions” > “Print packing slip”
- Check that the bin location appears on the slip
- Test with several different products to ensure consistency
When testing your implementation, remember that Shopify sometimes caches templates. If your changes don’t appear immediately, try creating a fresh test order.
Supporting multiple storage locations
If some products are stored in multiple locations, try this more advanced approach:
- Create your metafield as described above, but select “Multi-line text” as the type
- Add comma-separated locations in the product data (like “A1-B2, C3-D4”)
- Use this alternative code in your packing slip template:
{% assign product_locations = line_item.product.metafields.inventory.stock_bin_location | split: "," %}
{% assign variant_locations = line_item.variant.metafields.inventory.stock_bin_location | split: "," %}
{% assign stock_locations = product_locations %}
{% if variant_locations.size > 0 %}
  {% assign stock_locations = variant_locations %}
{% endif %}
{% if stock_locations.size > 0 %}
<span class="line-item-description-line">
Stock Locations: <b>{{ stock_locations | join: ", " }}</b>
</span>
{% endif %}
Troubleshooting common issues
When something isn’t working quite right:
- Double-check that your metafield spelling matches exactly in both your product settings and template code
- Make sure you’re using a consistent naming format for all your location data
- For large catalogs, consider using Shopify’s bulk editor or CSV import to add location data to multiple products at once
- If your packing process involves minimum order quantities, see our guide to setting min/max quantities for additional fulfillment controls
This metafield customization gives you a professional warehouse management feature without additional costs. By using Shopify’s built-in functionality, you’ve created a custom solution that can significantly improve your fulfillment efficiency and accuracy. For stores that ship internationally, market-specific order rules can further streamline how you handle orders from different regions.
While this customization isn’t directly related to most Shopify apps, it works perfectly alongside tools like DC Order Limits to create a more streamlined, error-proof fulfillment process for your business.
Looking for more ways to optimize your Shopify store? Check out DC Order Limits app for advanced inventory control options.